The process to create a link with Linkvertise is quite simple and self-explanatory. We’re going through this step by step in this article anyways.

Do you need any further help?
If you have any issues regarding your Linkvertise account, just go to the “Support” section and ask your question in the support chat. We’ll answer once everyday (excl. weekends). We’re always trying to fix your issues as fast as possible.
How to create a Linkvertise link?
The basic process of creating a link contains of 6 steps. We’ll go through every single one of them – just click on your desired step.
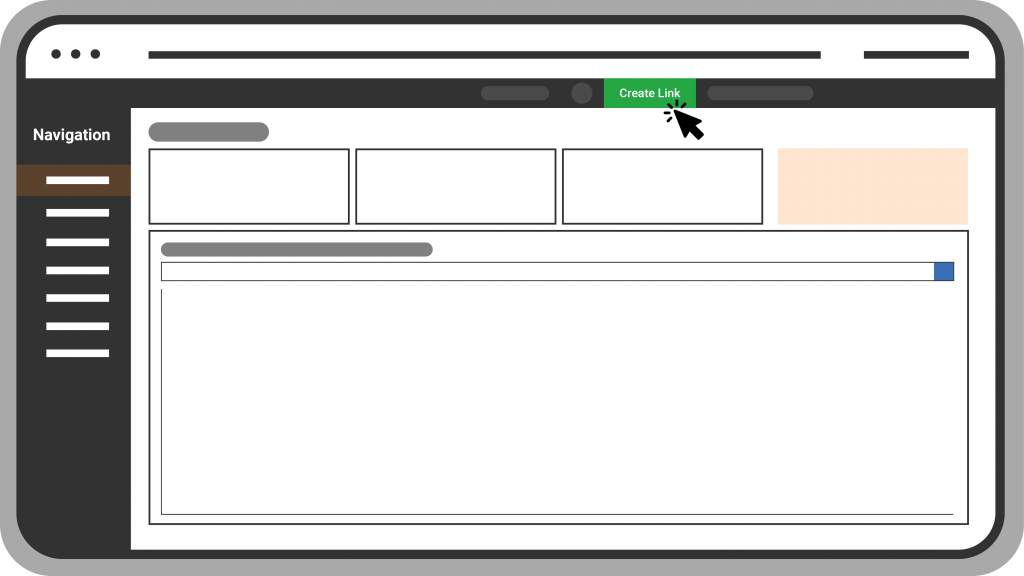
In general, you’ll have two opportunities to get to the “Create link”-Button.
You can either use the green “Create link”-Button in the header bar. It will be pinned here permanently. On the other hand you can click on the green button in the Linkvertise Dashboard below the link table.
1. Create Link
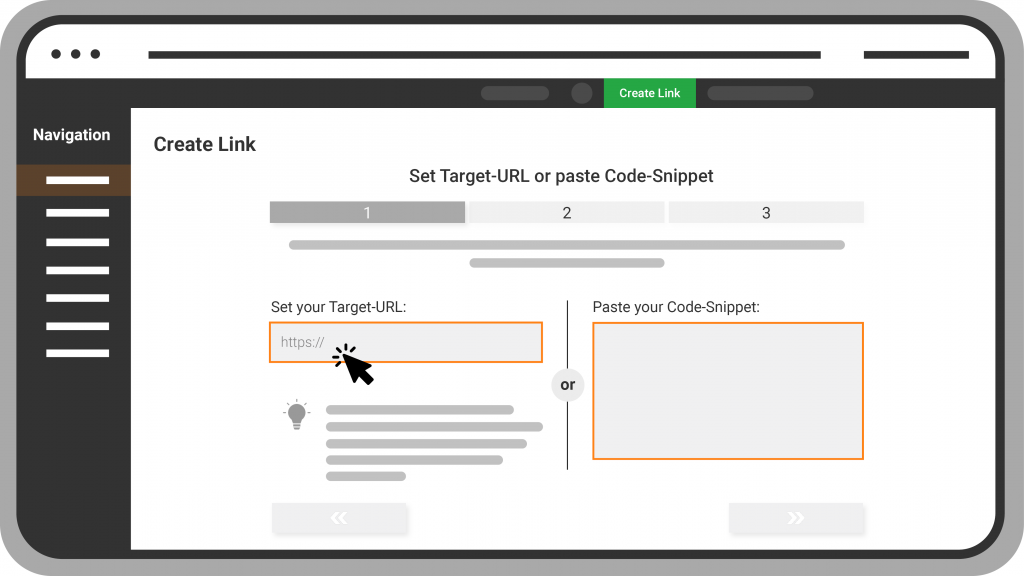
After clicking on the “Create Link” button, a window opens with the first input option. In the field “Set your Target-URL” you must enter the link you want to shorten.
If you’d like to redirect Linkvertise Link to YouTube.com, enter https://www.youtube.com.
It is important that the correct URL format is taken. That means you have to write http:// or https:// (depending on which variant the website uses).
Furthermore, there is also the option to insert your Code-Snippet. For this you can use the right field “Paste your Code-Snippet”.
You can only use one of them at a time.
2. Target-URL
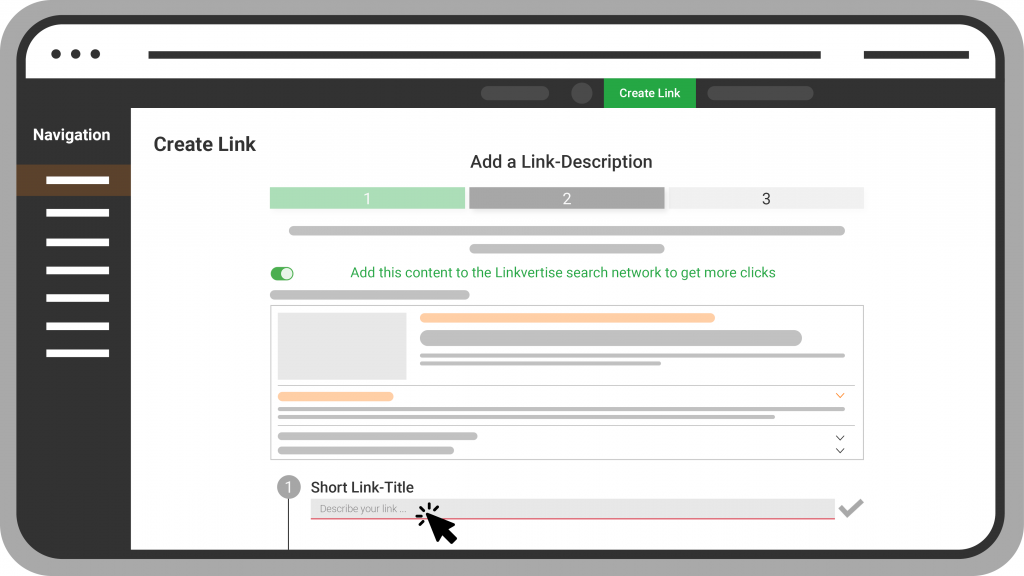
In the next step you have to add a Link-Description.
Here you can choose if you want to add your content to the Linkvertise search network or no. To do this, turn the switch on or off. By adding you will generate more clicks.
Furthermore, you need to give your content a Short Link-Title. Describe it precisely in a few words.
Then you have to describe your link with an appealing title.
Once you have done that, you still need to describe your link in detail and explain what visitors can expect on the target page.
In the fourth step you can choose your FAQs. Drag up to three predefined or already written FAQ’s into the storage fields provided.
Alternatively, you can create a new FAQ.
Last, you can optionally link a screenshot or tutorial of your content. This helps you to place your link more dominant in the Linkvertise and Google search engines and leads to a significant increase in views.
3. Link-Description
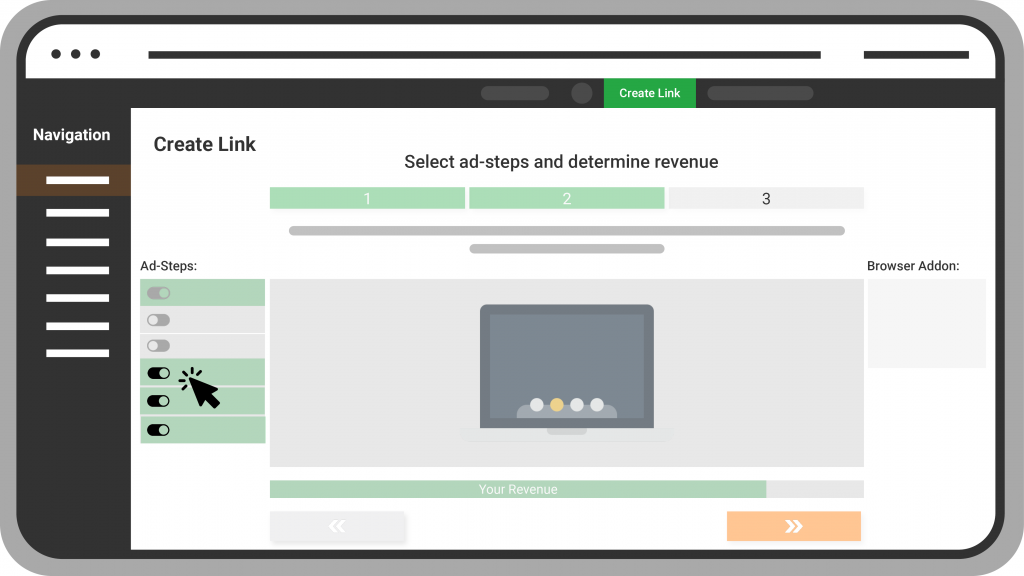
In the following step, the advertising settings must be made. Here you have the freedom to choose which advertising you want to allow. In the ad-settings article you can find more details. For created SEO links you will receive an additional ad task “Banner Ads”.
Parallel to the advertising settings you can see a “Your Revenue” bar, which adapts to the settings made. The more advertising you allow, the higher the revenue. If you want to know more about the individual advertising possibilities, there are already detailed articles in our support area.
After this your Link is successfully created.
Now you can share it with the community!
4. Ad-Settings
Now you’re all done and ready to earn revenue. Just share your link and start your journey! If you’re not sure on how to continue your Linkvertise-Journey then just check our other article or look into our YouTube-Channel. We have a lot of videos that’ll help you there.

We hope you found the solution for your question in this article and it will help you to create your first link. We wish you the greatest success!
Your Linkvertise Team!